
Planning and hosting webinars can be overwhelming. It involves several steps; forgetting even one can significantly impact the overall event's success. From the tiniest of details (like finalizing the date and time) to preparing the slides and marketing material, things can quickly go off-track without the right help.
To bring a method to this madness, we have prepared a webinar checklist that ensures you incorporate all the essential elements. It's your key to planning successful, flawless webinarsthat provide an energizing, enchanting attendee experience.

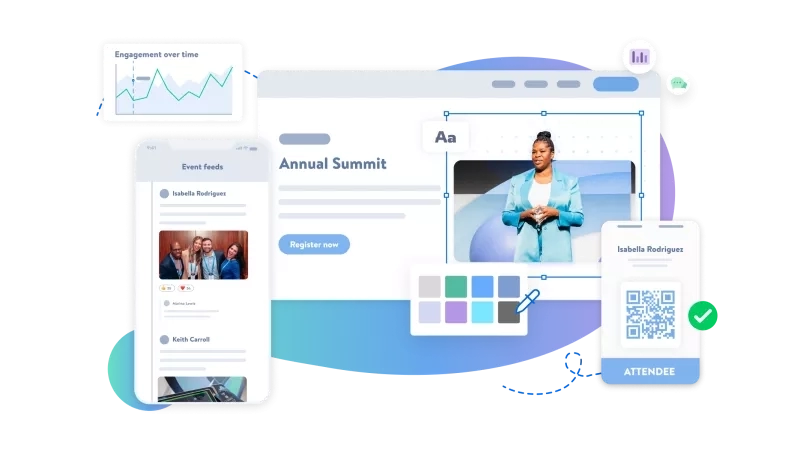
Webinar checklist
Before you start with the webinar checklist, identify your goals and KPIs.
Identify your goals: Think about why you want to host a webinar. Ask questions like what is the end goal of your webinars? Why do you want to host them? Do you want more leads or promote a new product/service?
Measure success with KPIs: To understand the success of your webinars, set key performance indicators (KPIs). These can be the number of registrations, show rate, drop-offs, pipeline contribution, etc. Measuring the performance is critical to improving the overall webinar’s success. After all, you cannot improve what you cannot measure.
Once you know your goals and how you will measure them, it's time to look at how to do a webinar step-by-step. Follow this webinar checklist, and you'll be well on your way!
Pre-webinar checklist
The best place to start with your webinar strategy is to build out a webinar timeline that gives you ample time to plan every piece, from finding the right webinar software and choosing the best date to building a content track that will entice and "wow" attendees.
8 weeks before your webinar
Pick a date and time: Select the date and time of your webinar. According to studies, Tuesday is the perfect day to host a webinar, followed by Monday, Thursday, and Wednesday.
Choose the webinar platform: Finalize the webinar platform based on your goals. Look for a webinar management platform that is easy to use for you and your attendees and can integrate with the tools you use daily. Also, it should provide different engagement opportunities such as live polling, Q&A, reactions, etc.
Decide the format: Webinars are of different types—from "ask me anything" and panel discussions to expert debates. Decide the format best suited to achieve your goals. Do you want the webinar to be a platform to hear what your audience has to say, or do you want to talk about the latest industry trends? Will you host a truly live webinar, or will you use webinar automation to connect with your audience? Asking such questions will help you finalize the format.
Determine the topic: This is the time to decide on the subject, which should be related to what your target audience wants to learn. To know your audience's pain points, conduct a pre-webinar feedback survey, analyze your website traffic, get insights from your sales teams, and so on.
Finalize speakers and host: Deciding the webinar format will help you choose how many speakers and hosts you want. Having at least one host (who can also be the speaker) and an extra person to assist with webinar logistics is ideal.
5 weeks before your webinar
Build the event on your webinar platform: Once you’ve locked down the topic, speaker, and event date, it’s time to build the webinar on your preferred webinar management platform. If it’s a paid webinar, ensure you define the audience tiers and correctly set the payment collection process. Make the registration process as straightforward as possible.
Create a landing page: The webinar landing page is the primary interface between your target audience and your content. Select an attractive title, have enough spacing between lines, and ensure the messaging focuses on the key value proposition. Doing so will help the potential attendees decide whether your webinar is worth their time.
Decide your webinar flow: Finalize the registration flow—how many follow-up emails you want to send and how your lead scoring campaign will look. Scoring leads will help you measure engagement. Based on your marketing goals, registering for the webinar might be a high or low future buying intent.
Create emails and social media copies: Draft all emails (invitation and reminder emails) and social media copies that communicate your webinar’s value proposition. Make them catchy and consider offering incentives for attending events, for example, raffle draws during the event.
Allow social sharing: All your follow-up emails and “thank you” page should allow registrants to promote your webinar among their peers, who might be just as qualified for the event.
Easily allow registrants to add the event to their calendar: Make a Calendar (.ics) file in Outlook or your preferred email/calendar program that includes the date, time, log in details, and a brief description of the webinar. The registration thank-you page and/or follow-up email should contain a link to this file.

3 weeks before the webinar
Schedule reminder emails: Know your email promotional schedule and set it up on your webinar management platform. The most common email schedule looks like T – 8, T – 4, and T – 2 days. Send 2-3 reminders over 5-7 days to drive maximum registrations from your email database.
Promote on social media channels: Use the social networks of your organization, webinar presenters, and hosts to spread the word on Twitter, Facebook, LinkedIn, and any other appropriate channels. It's crucial to keep the message brief and crisp, especially when you have one or two sentences to work with. Use URL tracking parameters while distributing the registration link to determine the precise source of registrations later.
Create a calling campaign: Involve your pre-sales or use automated voicemail reminders to drive attendance and increase engagement with potential leads.
Design follow-up emails: Hosting the webinar is only half the job done. Immediate and regular follow-ups are necessary to convert a lead into a customer. Therefore, prepare the follow-up emails ahead of time so you can send them soon after the webinar.
Create three email versions: for those who attended, those who missed it, and for ones who were interested but requested "slides-only." Include the webinar recording, slides, and further information related to the webinar topic.
Draft webinar slides: This is the time to create the webinar slides. Remember to include your social media hashtags and a clear call to action on the final slide.
2 weeks before your webinar
Create a poll: Build a poll in the webinar platform aligned with your presentation. Take this opportunity to make the session interactive and engaging and gather first-hand information from your attendees.
Prepare moderator/host notes: A set of moderator notes provides the extra security you need. Prepare a few sample questions for the webinar's Q&A session in advance.
Additionally, copy the webinar script's first few lines and last few sentences verbatim. These are typically the passages that can cause a speaker the most anxiety.
Upload webinar deck: Once you've finalized the deck, upload it on the webinar management platform and review it once. Identify the moments you want to pull up the poll questions and add those slides to the presentation.
1 week before your webinar
Conduct rehearsal: Use the webinar practice run to familiarize yourself with the webinar technology. Do a sound check, review the slides, see how the poll works, and practice messaging the presentation team via chat.

Day-of-webinar checklist
Send a reminder email: This is the final reminder to people who still need to register for the webinar. It should include all the required information, including a hashtag, time, date, and log-in information.
Send another email to people who have registered for your webinar. This will ensure a high show rate. Both these emails should be sent from the speaker or the webinar host.
Post on social media: Use social media platforms like Twitter and LinkedIn to promote your webinar using the pre-decided hashtag. Also, schedule an update to go out minutes before the webinar with the access information.
Day-of promotion creates buzz around the webinar. Have a dedicated resource to monitor and engage from your official social media accounts during the webinar.
Use a wired connection: It's better to use a wired internet connection to avoid Wi-Fi issues. Do a quick sound check and dial-in to ensure everything works as planned.
During your webinar
Showtime, finally! Here’s the checklist to follow during the webinar.
Record the webinar: Don’t forget to record the webinar as soon as you go live. Your registrants expect you to share it after the session is over.
Follow the notes: Use your prepared notes and strike off all the items you complete as your webinar progresses.
Tweet: Share relevant content from the webinar on Twitter and LinkedIn. You can draft these in advance when you prepare your social media copies.
Answer questions: Use your webinar hashtag to answer questions from Twitter, LinkedIn, and the webinar platform. Encourage participants to ask questions using the chat feature.
Thank your audience: Give a shoutout to all those who participated in the live webinar. You can use Twitter, LinkedIn, and other social media platforms.
Live events usually have elements of unpredictability. That’s what makes them exciting and engaging. Have a thought-out backup plan to avoid any risk and last-minute glitches and get the most out of your investment.

Post-webinar checklist
Process webinar recording: After the session is over, download your webinar recording, edit it, if required, and share the link via email, on your YouTube channel, and other social media channels.
Activate post-webinar email campaign: If you are following this webinar checklist, you must have drafted follow-up emails for attendees and no-shows while finalizing pre-webinar activities. It's critical to send them as soon as possible since people tend to forget in their busy schedules. Therefore, now is the time to send them.
The email should include content related to your events, such as the webinar slides, recording, resources, and a prominent call to action. A prompt follow-up significantly improves your chances of engaging your attendees.
Follow up with the prize winner or top tweeters: If you do go ahead with having a raffle at your event, individually follow up with the winner and thank them for their interest. You can also encourage them to share the award on their social media channels.
Similarly, follow up and engage with participants who actively used your event hashtag and amplified your content on social channels. Reach out to them individually and thank them.
Conduct post-webinar survey: Now is the time to conduct a survey to determine if your audience liked your webinar content. How was their experience? Is there anything they would like you to improve?
Ask closed-ended questions to learn more about your audience and gather actionable feedback to improve future webinars. In the end, allow people to give general comments and follow up with people who leave testimonial-worthy feedback.
Set up redirects: This might seem obvious but is often ignored or forgotten. So, keep this line item in your checklist. Place a redirect from your registration page to the new on-demand event page.
This step is critical since people might search for your webinar and click on the inbound links you promoted a few weeks ago. Therefore, convert this traffic to your on-demand webinar page to allow people to provide their details for viewing the webinar. Also, remember to update your webinar listings!
Create social media posts: Before the session, you used various social media channels like Twitter, Facebook, and LinkedIn for webinar promotion. Once the post-webinar recording is available, create an update about the webinar and post it on these channels. The update can include information like questions asked by attendees, what was covered during the session, or any other topic you think will intrigue your audience.
Analyze the results and share them with your team: Even though some results become apparent after a few weeks/months from the webinar (such as pipeline contribution), there are some metrics you can immediately track.
These include:
- Total number of registrants
- Total number of attendees
- Total number of relevant questions
- Total number of new leads
- Total number of new prospects
- Drop-off rate during the webinar
- Number of tweets, retweets, and mentions on Twitter
- Number of shares/comments/likes on Facebook and LinkedIn
- Average ratings from the post-webinar feedback survey
Once you have these metrics ready, share them with your team and thank them for making it happen.
Check all the boxes on your webinar checklist
If you've followed this guide, congrats! Your webinar planning is already underway, and you're setting yourself up for success.
Even though there are so many steps involved in planning, promoting, and executing a successful webinar, fortunately, you don’t have to remember them all. This checklist is all you need to create a seamless experience for everyone involved.
Webinar checklist FAQs
Still have questions about building your webinar strategy? Check out these FAQs for more insights into organizing and hosting successful webinars:
What do you need for a webinar?
You don't need much to host a great webinar, just a few essential items: a webinar platform that can help you achieve all of your goals, great speakers, engaging content, and a webinar marketing strategy that's going to ensure you get the most out of your webinar.
What is webinar etiquette?
Webinar etiquette is a set of accepted behaviors all webinar attendees and hosts should follow in an effort to be polite and attentive during a webinar. For attendees, webinar etiquette includes tactics like asking questions at appropriate times and being courteous to other attendees while speaking or chatting. Good etiquette for webinar hosts involves much more, from welcoming attendees and maintaining professionalism to ensuring all attendees' accessibility needs are met.
What is a webinar funnel?
A webinar funnel is a form of marketing and sales funnel that uses webinars to collect, nurture, and convert leads into paying customers or users.


