


Conference badges should segment by role, show key info, include QR codes, and enable personalization. Well-designed conference badges make for better event networking and can be pivotal in streamlining event logistics.
Before the first handshake, the first session, the first one-on-one appointment, every attendee, regardless of level, receives a name badge at check-in. This interaction, their first "real" experience on-site, is critical. The badge they receive will remain with them for the duration of the event, whether it's an afternoon session or a 3-day conference.
With the corporate events market projected to reach nearly $600 billion by 2029, organizers are investing more effort into making every touchpoint memorable, and technology plays a significant role in this effort. Even something as simple as a badge has become a strategic element in crafting a smooth, tech-enabled attendee journey.
In this post, we’ll explore why event badges matter, what it takes to design a good one, best practices, and how tools like Cvent OnArrival and Event-in-a-Box are transforming the check-in and badge experiences worldwide.

The importance of conference badges
Badges are the first branded items attendees and guests receive, and something they’ll wear and depend on throughout the event.
A conference badge displays the name, role, registration type, and affiliation of the individual. This removes friction from networking. Attendees can spot peers across the room, recognize potential partners, or start a conversation without that brief, awkward pause of“Sorry, what’s your name again?”
Badges also streamline event operations. Barcodes, QR codes, or NFC chips enable quick check-ins and efficient session tracking, so you spend less time managing check-in queues. Badges, when paired with other digital tools, can also provide data-driven insights, such as who attended and which sessions were most popular. That data can inform smarter conference planning and demonstrate ROI to stakeholders.
Visually, a badge can serve as a miniature extension of your event’s brand identity. The color, font, layout, and lanyard design all send subtle signals about your event’s tone and professionalism. Add sponsor logos or taglines to create new visibility for partners and monetize your event.
How do you create conference badges?
Define your segments
Before you even open your design tool or select materials, take a moment to consider what your badge needs to do. Is it just a name tag for identification, or will it also control access to sessions and track engagement data? Your answer changes everything.
Different attendee types, including speakers, sponsors, exhibitors, VIPs, and general participants, will have different needs.A speaker might need a badge that grants them backstage access, while a VIP’s badge could provide them with access to reserved lounges or networking events. Mapping out these groups early on will impact the layout, color scheme, and even the tech you’ll build into each badge type.
What to include
The best badges strike a balance between information and simplicity. You want them to be functional, not cluttered. At a minimum, include the attendee’s name, job title, and company. Many planners also add a registration type, along with a QR code or barcode, for quick scanning.
You can also use subtle design cues to communicate access levels, such as a color strip, lanyard pattern, icon, or corner mark that differentiates staff from attendees or VIPs from general admission.Just remember, less is more.A badge with too much text or logos becomes hard to read at a glance and loses its main purpose: instant recognition.
Clear and scannable design
Readability is key when dealing with large, fast-moving crowds. Use clean typography and bold contrast between text and background so names and key details stand out from a few feet away. White space is your friend here. It helps the design breathe and maintains a professional look.
Stick to your brand’s color palette and alignment, and plan a dedicated area for QR codes or NFC chips. Avoid placing these near folds, edges, or lanyard holes where they might get bent or blocked.
If you’re stuck for ideas, consider badges from other conferences of a similar size or audience. Real-world inspiration often gives ideas that templates can’t.
Choose the right materials and badge type
The material says a lot about your event before anyone reads a single word. A paper badge might work for a short single-day seminar, but for multi-day or high-profile conferences, attendees expect something more substantial, such as laminated passes, plastic cards, or even RFID-enabled smart badges that integrate with your event app.
It will depend on several practical factors: the length of the event, whether it’s held indoors or outdoors, your sustainability goals, the level of technology required, and, of course, your budget. Many are now opting for eco-friendly materials, even if they cost a little more, as attendees are starting to notice and appreciate the benefits.
Plan for personalization and printing logistics
Personalization adds a professional touch. Whether you’re pre-printing badges or printing on-site, ensure your system can retrieve data from your registration platform. For large events, consider solutions that automate this process and sync with real-time attendee lists to streamline the process. If you’re doing on-site check-ins, invest in printers that can handle high volume without delay.
Test and train your staff
Before the event goes live, run your badges through a quick test to ensure they are functioning properly. Print a few and see how they hold up. Is the font still readable in low light? Does the event check-in software recognize the QR code immediately, or does it require a few attempts?
You’ll also want to see how the badge hangs when someone’s moving around. If the lanyard keeps twisting and hiding key info, it’s worth adjusting the design before showtime. Don’t forget to train your on-site staff and volunteers since badge-related delays can have a ripple effect on first impressions and session attendance.

Conference badge best practices
Make them readable from a distance
As a general rule, keep the first name large and easy to spot. Use a font size of around 32 to 48 points and scale down titles or company names so they’re visible but not competing for space (there are exceptions to design based on your event type and attendees). Avoid using fancy fonts that look great on screen but might be tough to read when printed on a badge. Additionally, opt for high-contrast colors, such as dark text on a white background. It’s simple, but it works in every kind of lighting.
Design them with scanning in mind
No matter what type of encoding technology you’re using on the badge, consistency is your friend. Keep these scannable elements in a clean, open spot, preferably the bottom corner or center, so staff don’t have to twist or angle devices. Steer clear of lanyard holes or badge folds that might block the code. If you’ve ever stood in a line while someone’s badge cannot be scanned easily, you know why this is important.
Use color and icons to simplify roles
A quick color cue can make interactions smoother. Each registration type should have a distinct color, icon, or stripe that helps staff and attendees spot it from a distance. Also, don’t rely solely on color. Try pairing it with a label or symbol for accessibility.
Take advantage of the back of the badge
The reverse side doesn’t have to be blank space. It's actually valuable real estate. Add a small venue map, Wi-Fi details, a QR code linking to the event app, or a short agenda for the day. Some planners even include emergency contacts or a feedback link. It saves people from having to dig through their phones and reduces the need for physical handouts.
Pick lanyards that stay put
Even the sharpest badge design falls flat if it keeps flipping. Go for wide, flat, or dual-clip lanyards. These hang better and stay in place. If you’re printing on both sides, you can also repeat key information so the badge remains legible regardless of how it's turned.
Plan for the unexpected
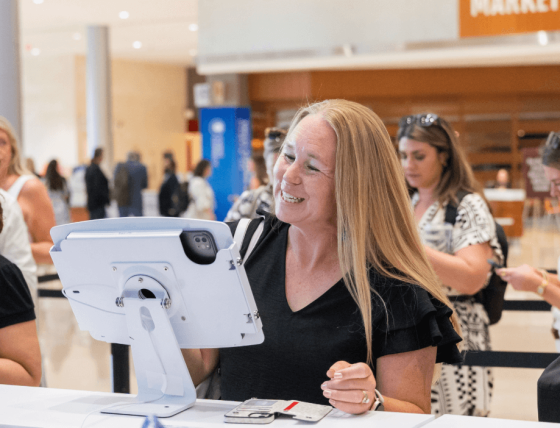
People forget badges, lose them, or show up to your event unregistered. It’s quite common. Set up a quick and reliable workflow for instant reprints and on-site registration, ensuring the lines keep moving smoothly. At Cvent, we have established a dedicated help desk, located separately from the main registration area, for these interactions. The process remains quick and efficient when utilizing our tools, such as Cvent OnArrival, which facilitates this with real-time syncing and on-demand printing. This results in fewer delays and less stress for planners at the check-in desk.

How can Cvent can help with creating conference badges?
Cvent’s OnArrival and Event-in-the-box solutions enable you to digitize onsite check-in, badge printing, and attendance tracking, allowing you to focus on engagement rather than event logistics.
OnArrival allows attendees to check in in seconds, whether with staff assistance or self-service kiosks, by searching for a unique identifier, such as their name or email. For walk-ins, new registrations can be processed instantly, and the system will sync all changes across devices.
Once checked in, you can print the badges on demand. There is no need to pre-sort or reprint stacks before the event. If an attendee’s information changes, you can edit on the spot and reprint. OnArrival supports multiple printers and badge types, allowing you to print professional, on-brand badges that match your event’s visual identity.
The system also streamlines session access and attendance tracking. A quick badge scan logs participation, verifies pre-registrations, and helps you monitor room capacity when you anticipate a packed session. Similarly, for continuing education programs, OnArrival can even record signatures for CE credits and automatically store compliance records.
All the information captured by OnArrival syncs directly with your CRM or marketing platform, so you can see what’s happening as it happens. Event managers receive live dashboards that refresh every few minutes, displaying check-ins and session attendance to identify trends, measure participation, and make adjustments on the fly while the event is still in progress.
Cvent also provides flexibility for different levels of onsite support.OnArrival 360offers a full-service experience led by a dedicated Project Manager, covering everything from software and hardware setup to onsite configuration, training, troubleshooting, and post-event take-down.
For smaller or distributed gatherings, Cvent’s Event-in-a-Box solution brings the same reliability in a self-service format. It’s a pre-configured kit that allows you to manage check-in and badging, without requiring a full technical setup or onsite staff. Event-in-a-Box is ideal for events where speed and portability are crucial, such as VIP meetings and recruitment events.

Conclusion
For something that fits in the palm of your hand, a conference badge carries a lot of weight. It’s the first handshake before the handshake.
As events become faster, smarter, and more data-driven, even the smallest touchpoints are evolving. The badge has evolved from a static name tag into a live, connected part of the attendee journey.
That’s the new standard. A future where check-in isn’t a queue, but a moment of welcome. Because in the end, great events don’t start with a speaker or a session. They start with a name, and the badge that brings it to life.
Frequently asked questions
1. What size are conference name badges?
There’s no universal badge size, but most conference name badges fall between 3x4 inches and 4x6 inches. That’s large enough for names and titles to be visible from a few feet away while leaving room for logos, QR codes, and other design elements.
2. How do you make a badge for a conference?
First, define what information needs to go on (name, role, company, and access level) and then move to layout and design. Use a clear font and maintain consistency with the brand colors throughout your event materials. Once the design is done, print badges with an event check-in tool like Cvent OnArrival, which supports on-demand badge printing, real-time data syncing, and customization by attendee type. That way, your badges are accurate, professional, and ready when attendees walk in.


